
Editing Submitted Applications
Submitted applications can be edited and reviewed as needed in the Applications module.

You can use the filters in the Applications module to search for students that meet any specific criteria you are intending to review. You can find more information on using the Applications module by clicking this link.
Basic Application Information
To edit an application, you will need to select the Edit button to the right of the application you want to review. The Edit button is the pencil icon.

The student's application will open in a new window where you'll be able to review and make any necessary changes to the student's application. At the top of the screen, you'll see options to Delete or Withdraw an application, as well as a link to the Student's Profile and a View dropdown that will allow you to select view the student's Change History or Communications Log.

Below these options, you'll see the student's name and system Student ID as well as any guardians attached to the student. You'll be able to add a student's SIS student ID, if necessary, or add and remove guardians from the student profile. If the student has multiple student records, you can select the Merge Records link which will allow you to merge any records into a single record. Below that, you'll be able to see what school or program the student's application is for.

Application-Specific Lottery Information
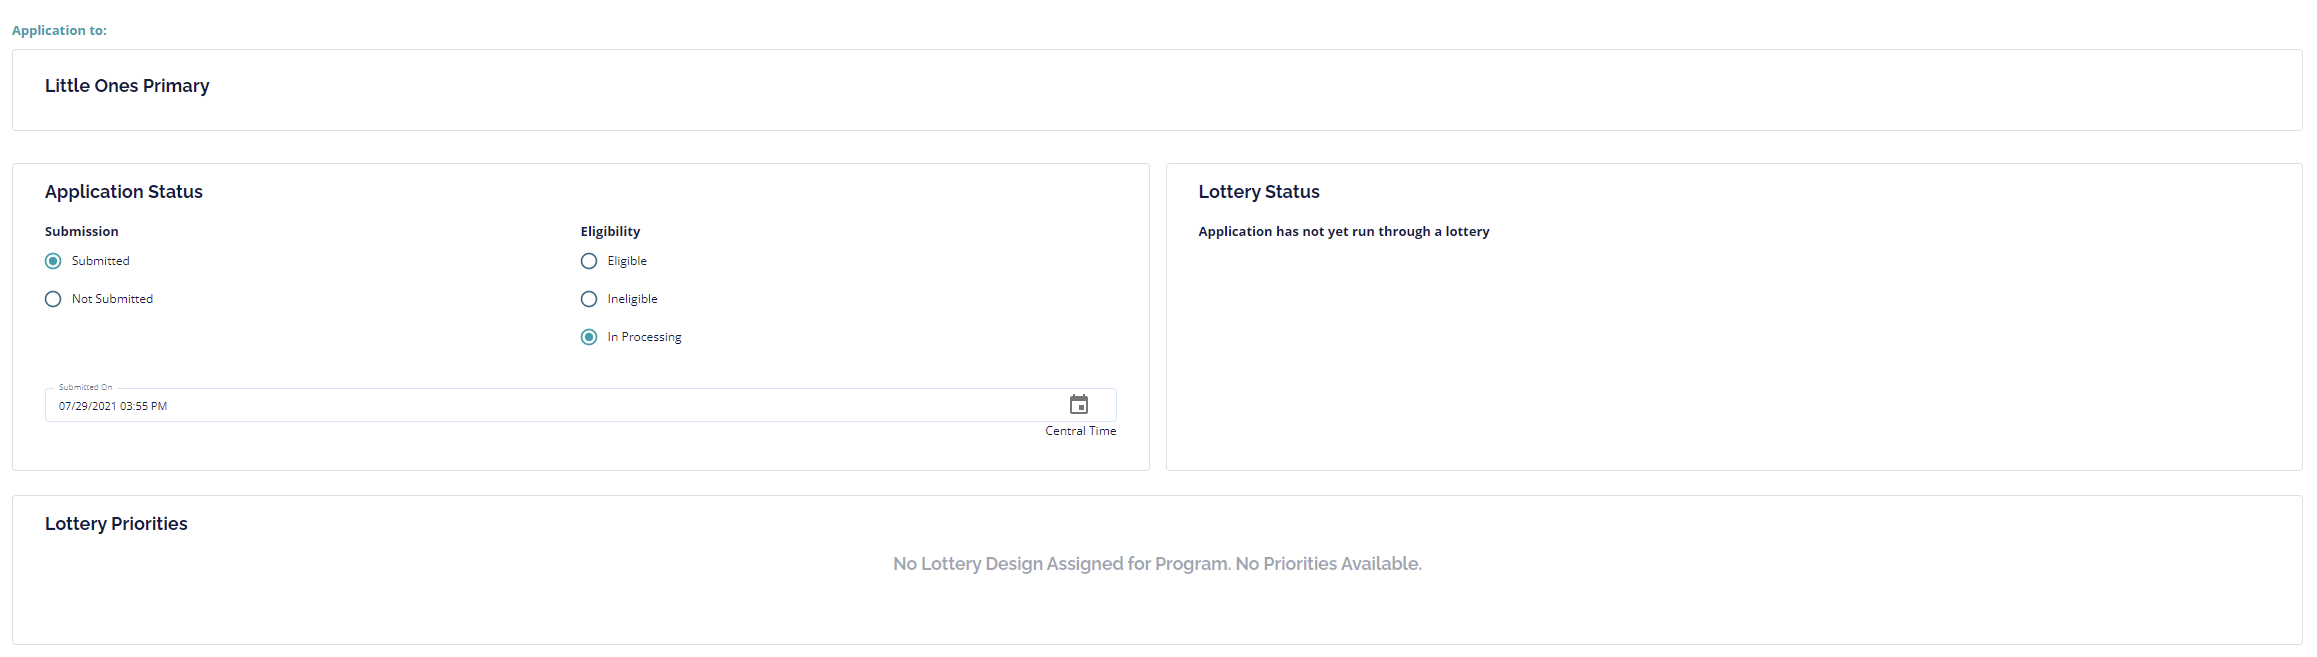
After the main student application information, you'll see an Application Status box as well as a Lottery Status box. In the Application Status box, you'll see a student's Submission Status, Submission Timestamp, and Eligibility Status.
The Lottery Status box will tell you if this particular application has been run in a lottery or not. If it has not been run in a lottery, you will see the message "Application has not yet run through a lottery". If it has been run, you will see the ranking of the application (whether the application has been placed on the offered list or waiting list), the Lottery Status (whether a parent has accepted or declined their lottery placement yet), and you will also be able to view the student's Placement History with the Placement History button.
No Lottery Status:
If Lottery has been run: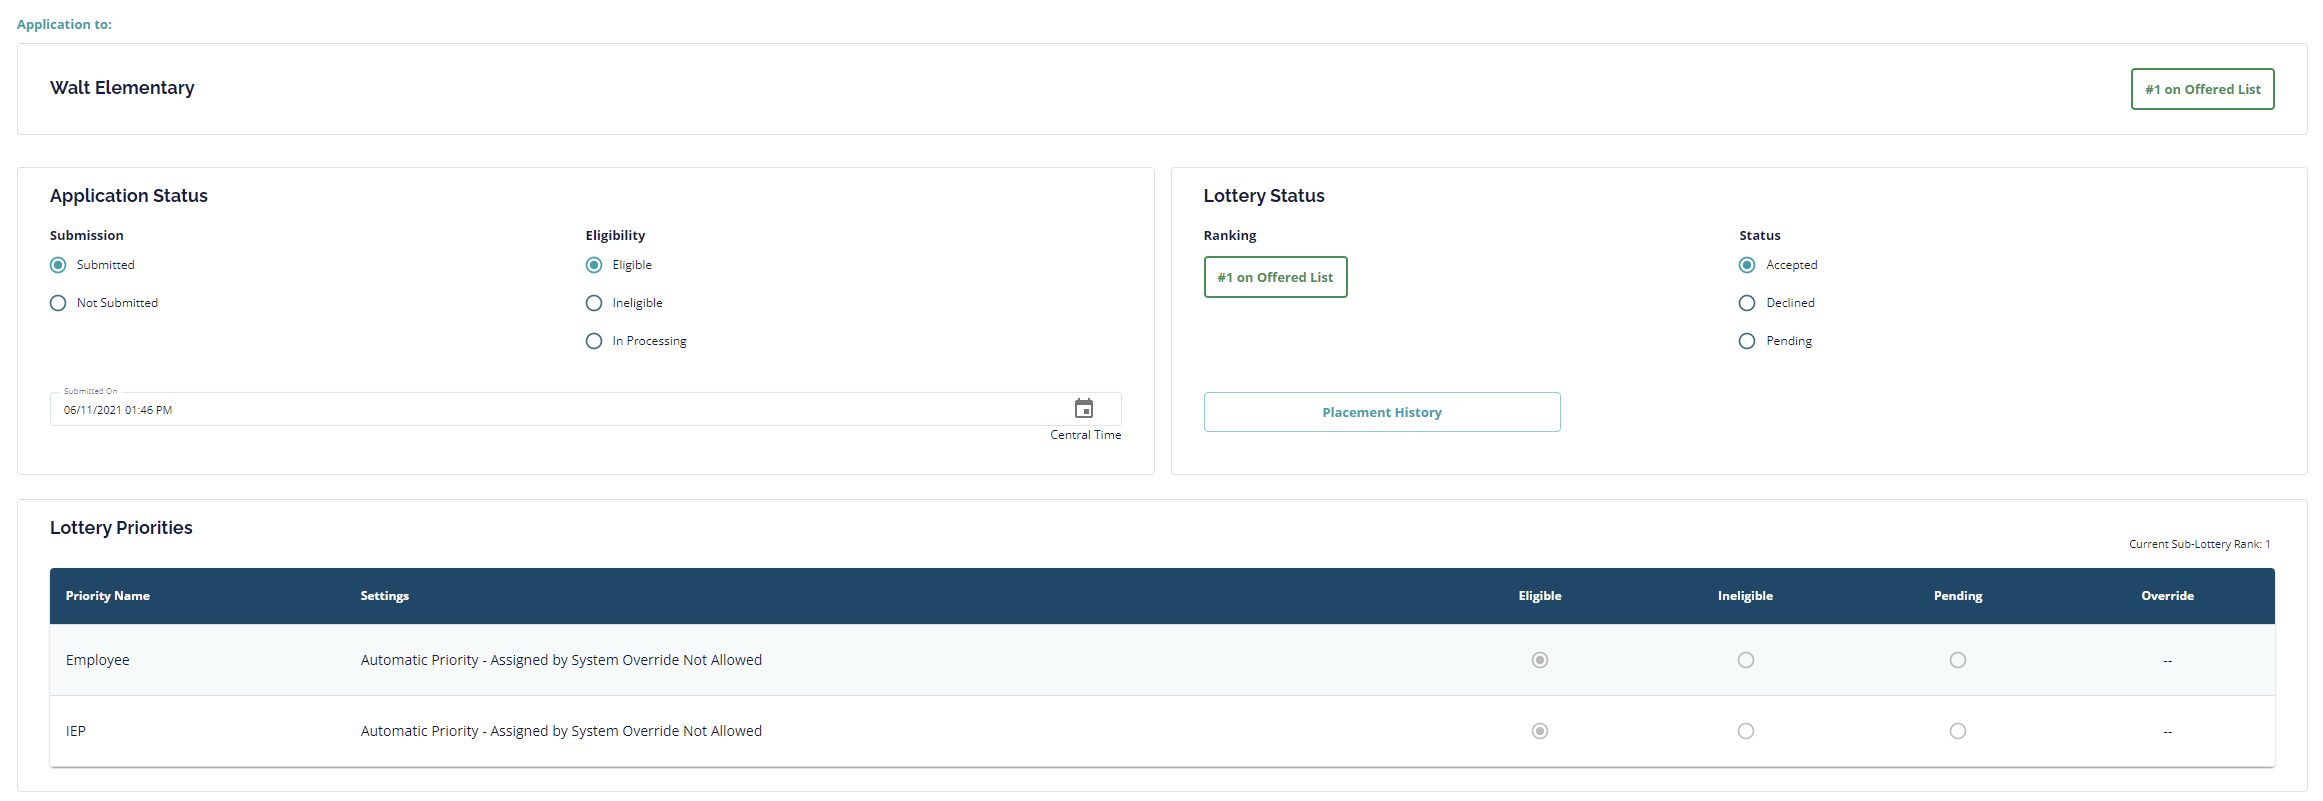
You can make changes to any of these options if that will be needed. For example, if you have reviewed a student's application and determined that they are eligible to be run in the lottery for the school they have applied to, you would change their Eligibility Status from In Processing to Eligible; If a parent or student has mistakenly submitted their application, you can set their Submission status to Unsubmitted.
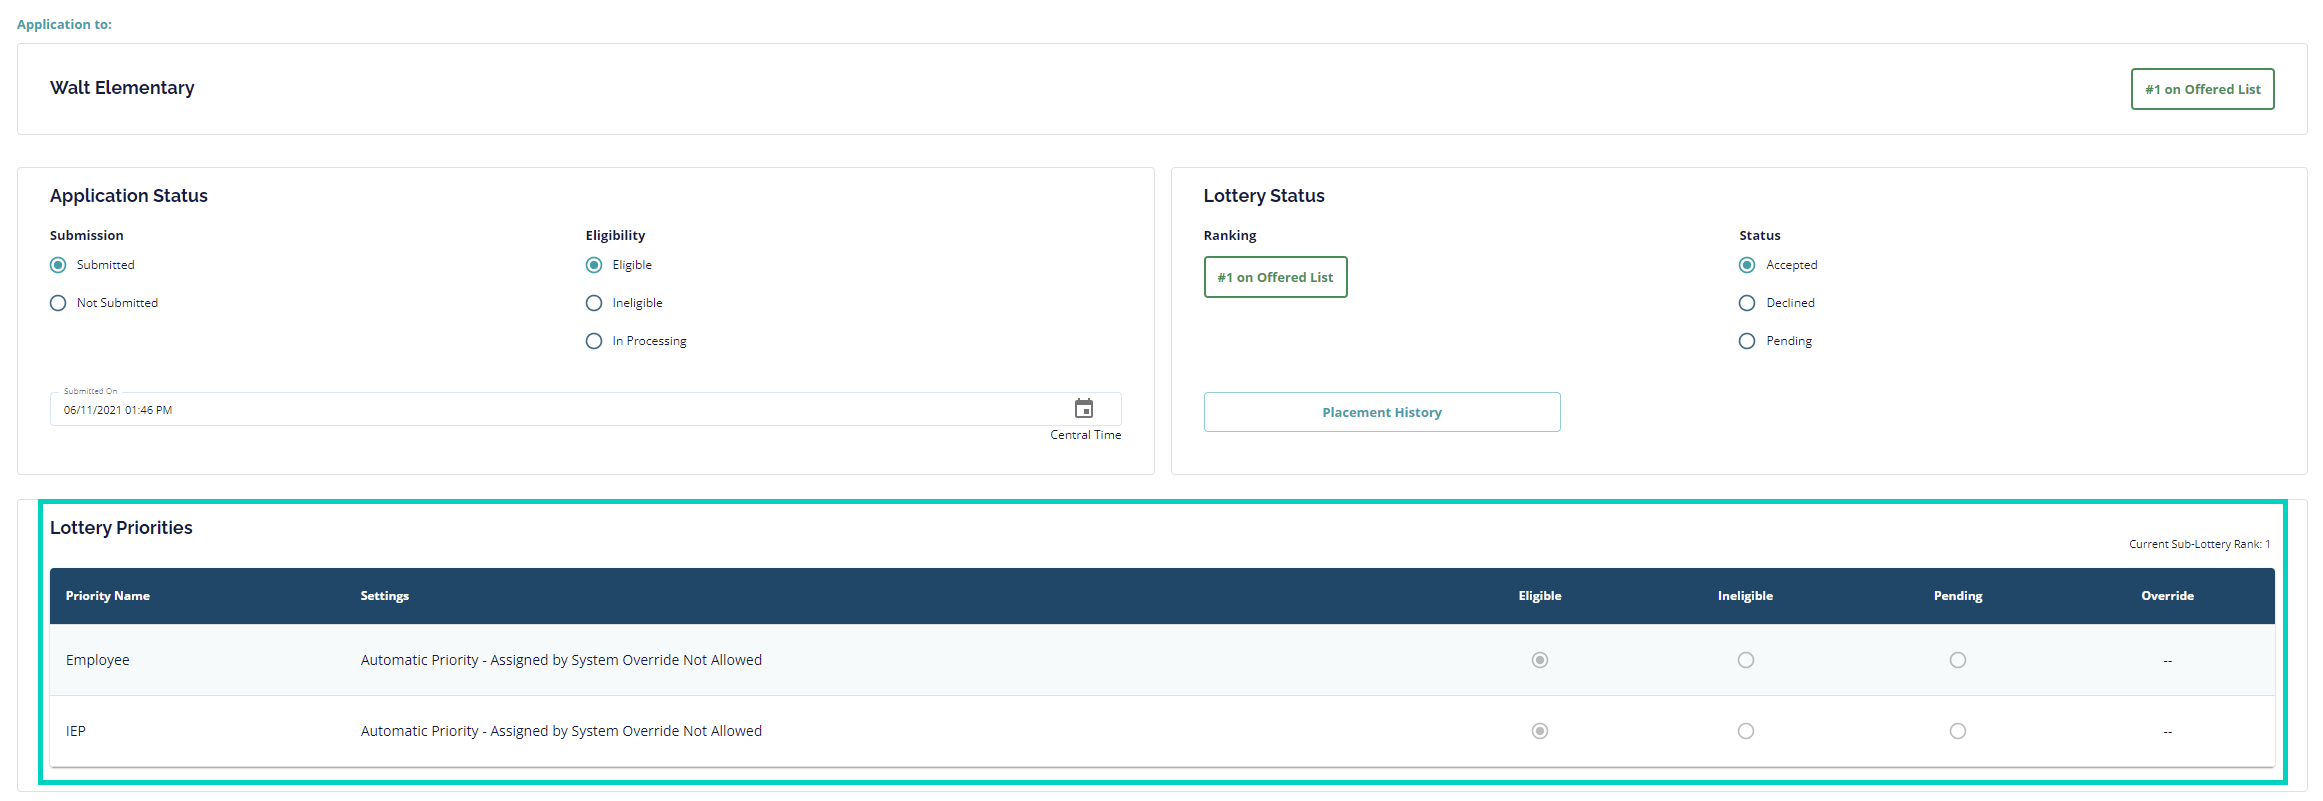
Underneath the Application Status and Lottery Status boxes, you will find the Lottery Priorities box. Here you will see a listing of priorities that are relevant to the school or program the student is applying to. You will see the name of the priority and will also be able to see if the priority is an automatically set priority or if it has to be set manually by an administrator. If it is a manual priority, you will mark the application as eligible or ineligible for each priority. If it is an automatic priority, you will see whether the student has been set as eligible or ineligible. If the ability to override an automatic priority has been enabled for a priority, you would have the ability to override that priority and change the answer to that.
Reviewing the Student's Application Responses
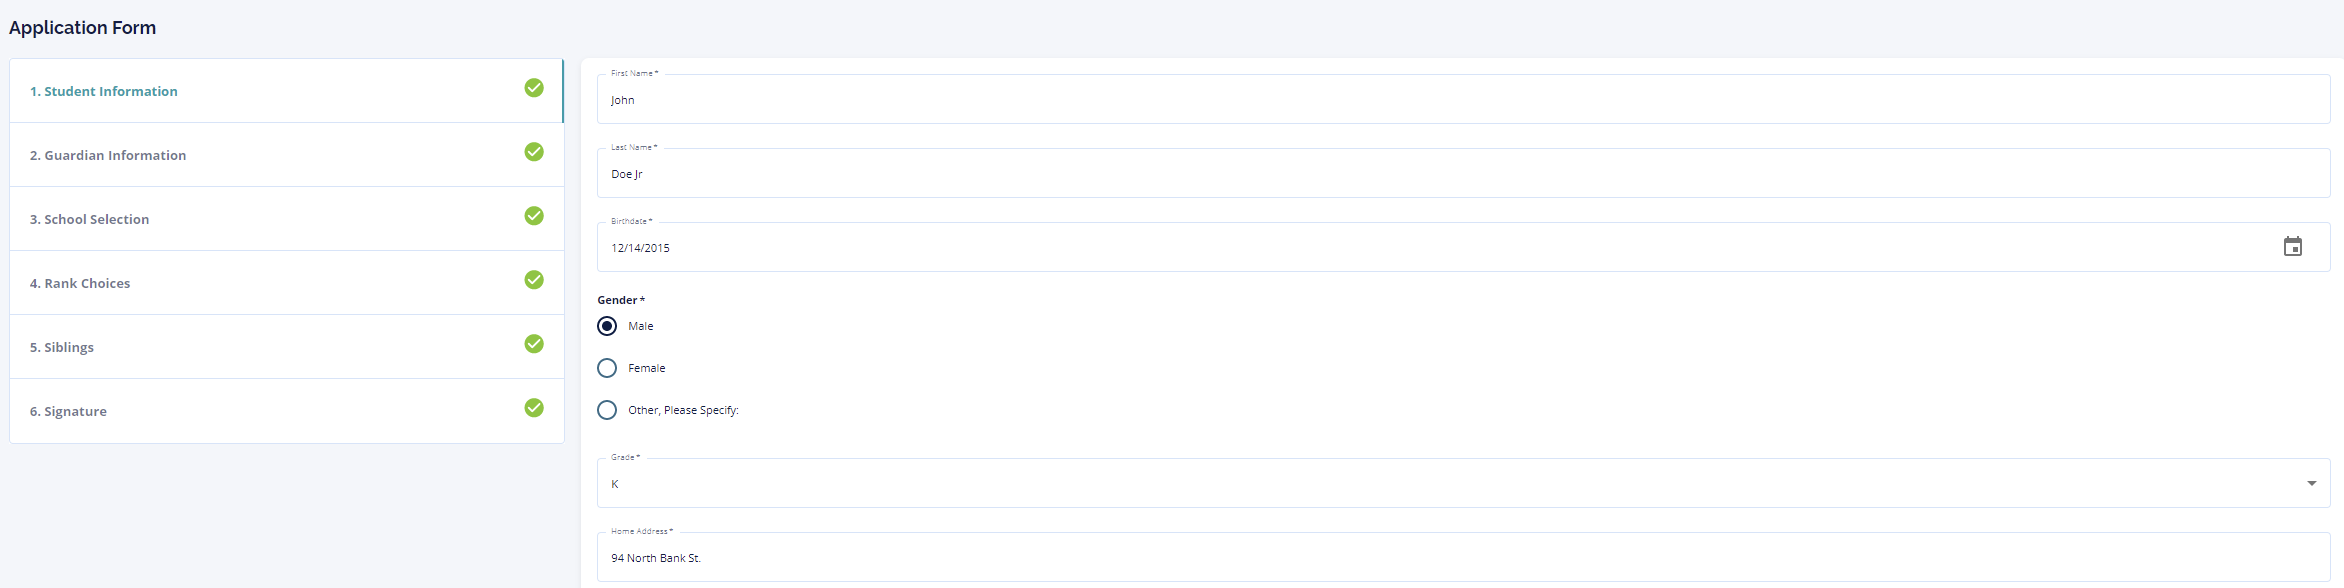
Once you have reviewed the application and lottery statuses and information, you can then scroll further down to see the student's actual application questions and responses in the Application Form section. You'll view the application one step at a time and have the option to view any step at any time using the menu on the left side of the screen. You can review all information submitted by the parent or student and make any necessary changes. For example, if a parent requests that the address submitted on the application be updated, you can do this from this area. Once you have completed reviewing the application, you can then select the Save Application button at the top, or the Save & Continue button at the bottom.
Entering Notes for an Application
Lastly, you will see the Notes box. Here you can leave internal notes about the application or student; these notes can be anything relevant to the application or student. In the Save Note To dropdown, you can select to save the note to only the application you are working in, all records for the student, or all records for all students that are attached to the guardians listed in the application you are currently working in. You'll then select a Note Type. Note types are editable and can be anything you need, but by default you'll see these options: General Note, Phone Call, Letter, In-Person Communication, Email, or Text Message. Once these settings are selected, you can then enter the text of your note before selecting the Save Note button!

Comments
0 comments
Please sign in to leave a comment.